

Showing posts with label adobe illustrator. Show all posts
Showing posts with label adobe illustrator. Show all posts
Thursday, March 22, 2012


Friday, March 16, 2012
Max and family sketch and final illustration


Tuesday, November 24, 2009

Thursday, November 19, 2009

Friday, October 30, 2009
Illustration process part 3
Here is another example of the aforementioned technique. (see previous post)

sketch.

line drawing.

final.
(I copied the crowd on another layer, flipped the layer, and changed colors to make it look like a larger crowd.)

sketch.

line drawing.

final.
(I copied the crowd on another layer, flipped the layer, and changed colors to make it look like a larger crowd.)
manga style illustration

I was digging through my old illustrations, and I came across this piece. I did a set of these manga style illustrations a few years ago for a Christian publisher. Unfortunately, this never saw the light of day, because of some kind of budget problem. I got paid, but the publication went under I think.
I kinda like this one.
Done with Adobe Illustrator
Illustration process part 2
Here is another 'anatomy of an illustration' piece.
I have a few different techniques that I use.
Here's one. This piece was done for LifeWay Christian Resources a while back. It was for a children's Sunday School curriculum I believe.
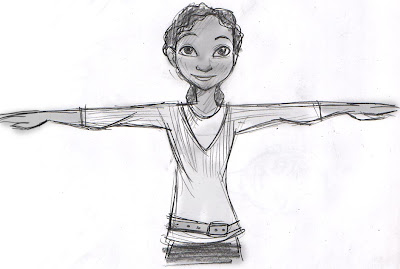
First, I did a sketch to present to the client.
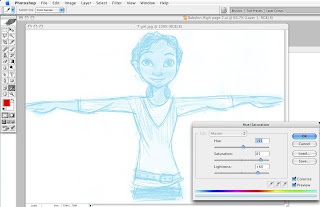
After approval, I took the drawing into photoshop and adjusted the hue, saturation, and lightness (image/adjustments/Hue-Saturation) until I had a light blue looking sketch. Then I printed it.
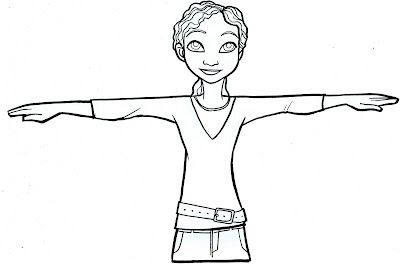
I drew over top of the blue lines with a brush pen and fine-tipped fancy shmancy art marker. I buy the heavier, brighter stock paper, so that I can do this technique without the ink bleeding. Then, I scanned the black line drawing back into photoshop and further adjusted any little dots or mistakes I may have made in the drawing step. (in the case of this illustration, I didn't have any errors, as far as I can tell)
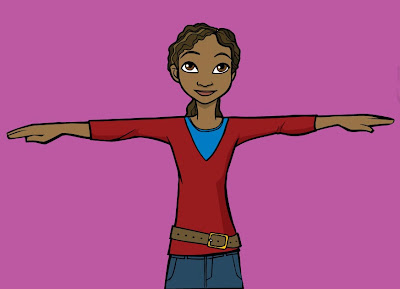
Then I exported the black line drawing to Illustrator, did a 'live trace' to convert the line drawing to vector, and then colored it, and added shadow shapes etc.
There. Finished.
I have a few different techniques that I use.
Here's one. This piece was done for LifeWay Christian Resources a while back. It was for a children's Sunday School curriculum I believe.

First, I did a sketch to present to the client.

After approval, I took the drawing into photoshop and adjusted the hue, saturation, and lightness (image/adjustments/Hue-Saturation) until I had a light blue looking sketch. Then I printed it.

I drew over top of the blue lines with a brush pen and fine-tipped fancy shmancy art marker. I buy the heavier, brighter stock paper, so that I can do this technique without the ink bleeding. Then, I scanned the black line drawing back into photoshop and further adjusted any little dots or mistakes I may have made in the drawing step. (in the case of this illustration, I didn't have any errors, as far as I can tell)

Then I exported the black line drawing to Illustrator, did a 'live trace' to convert the line drawing to vector, and then colored it, and added shadow shapes etc.
There. Finished.
Subscribe to:
Posts (Atom)